
How to replace the Front Upper Bushings and ball joint – NM Pajero
The NM model starting to show its age, the newest ones, are already 11 years old. The rubber is getting dry and you will start to hear all kinds of knocks and noises while driving.
I noticed a minor play and knocks on the front wheels, checking that issue showed that the bushing on one side were already torn and the upper ball joints should be replaced as well.
This post will explain how to replace the upper front control arm bushings and ball joint.
The hard work here is to remove the old bushings, you may want to check the price of a new control arm with the bushings installed, sometimes it worth the price…
Required tools:
Jack stand
2x 22mm wrenches
12mm wrench/socket
Ball Joint remover (I’m using this type)
Hammer
Chisel/flat screwdriver that you can hit on it with the hammer.
Hydraulic press or big heavy clamps + sockets and plate to press the old bushing and new one.
Grindstone spindle
Parts:
Support us by ordering through this eBay ad:
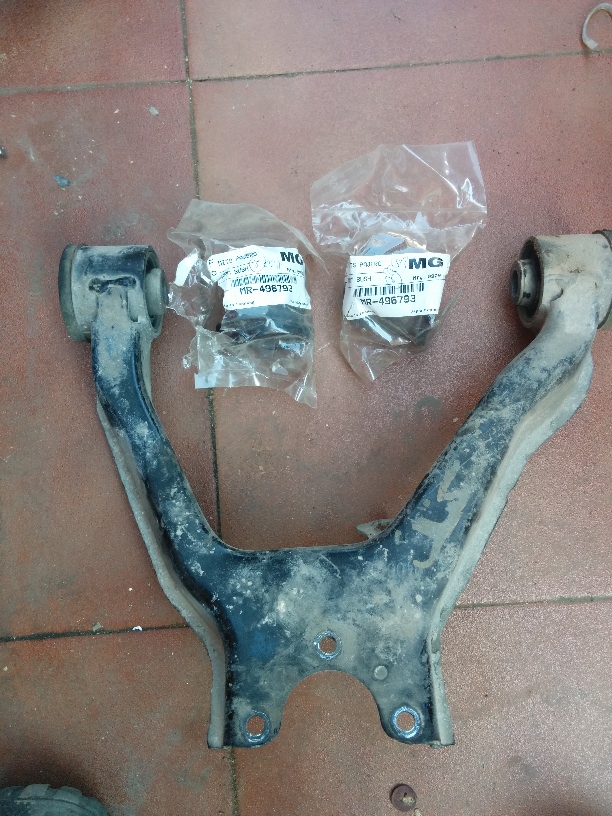
Bushings – 2 for each control arm – You may find on eBay
Upper ball joint (one for each control arm)
OR – you may buy a new complete control arm and save the hard work. Here is a sample on eBay
Let’s start working:
1. Release the wheel nuts a little.
2. Secure the car, put some blocks before and after the rear wheel, keep it in P if it is automatic, verify the hand brake is on.
3. Lift the relevant front wheel, secure it with a jack stand under the frame. Lower the car till it stops on the jack stand.
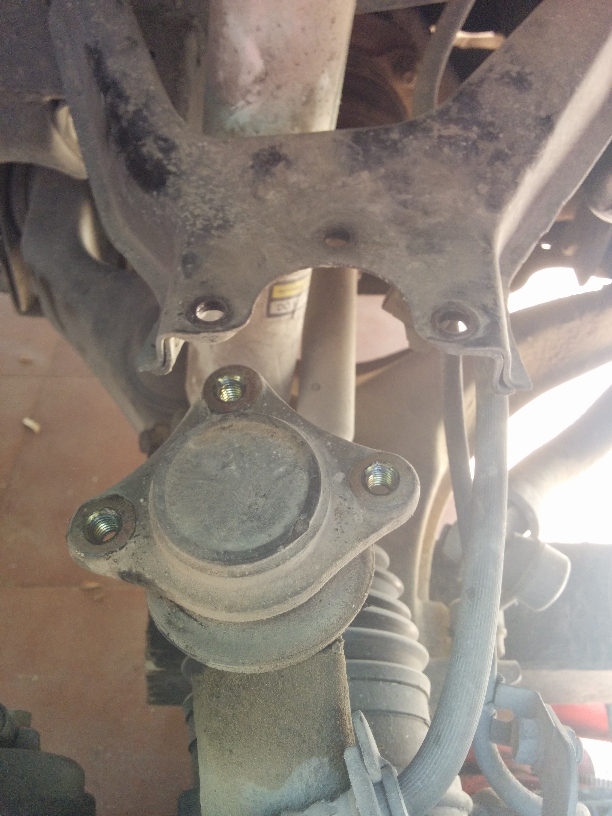
4. Remove the wheel. Here is what you are about to see:
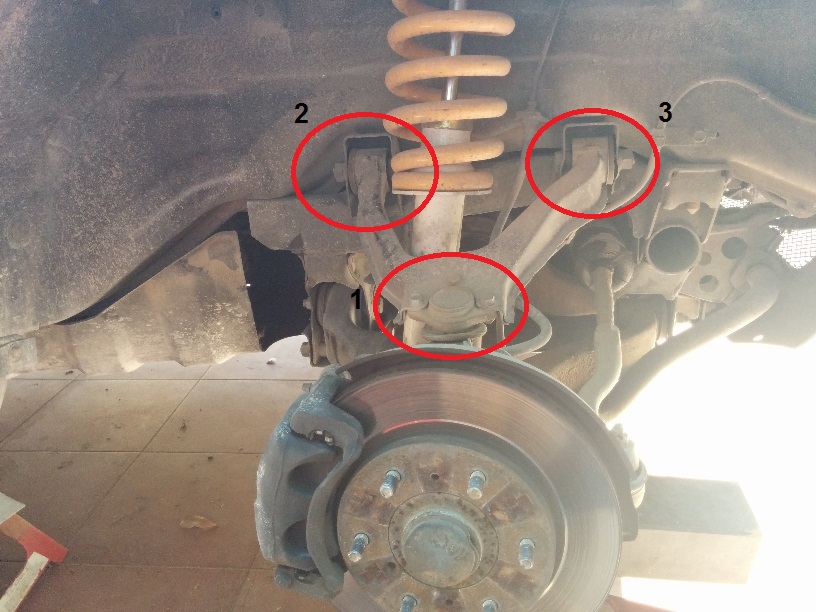
- 1 – Upper ball joint bolts
- 2,3 – upper control arm bushings
In order to replace the bushings, we have to remove the control arm. If you have to replace the ball joint, it will be a good idea to remove it while it is connected to the upper control arm (3 bolts in place)
If you don’t have to replace the ball joint, skip step #5
In order to remove the ball-joint, insert your ball joint remover while the 3 tops bolts are still in place:
5. Remove the securing pin.
Use a 22mm wrench to remove the nut.
Use a ball joint remover to remove it from the wheel hub
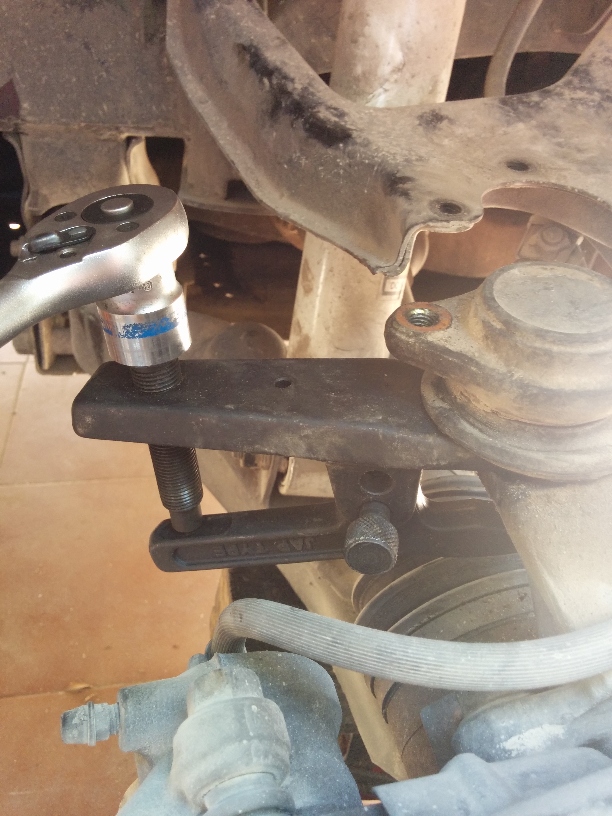
Notice that I removed the 3 bolts on the top first, that is not a good idea as the ball joint is under huge pressure with the remover and it just flew out of its place with nothing to stop it (could hurt me…)
So, keep the 3 bolts on top in place while you are using the ball joint remover.
6. Remove the 3 bolts on top of the ball joint.
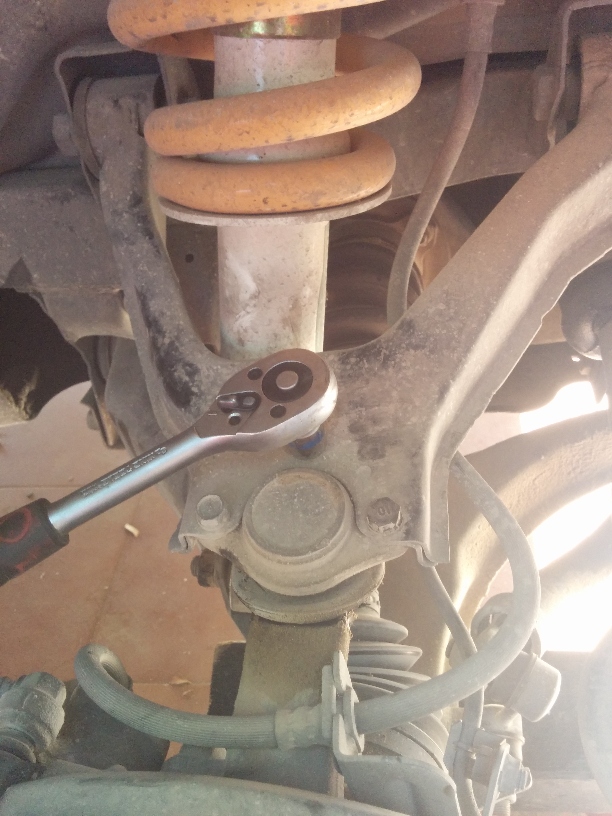
7. Remove the bolts that hold the control arm to the frame (2,3 in the first picture). Use 2X 22mm wrenches.
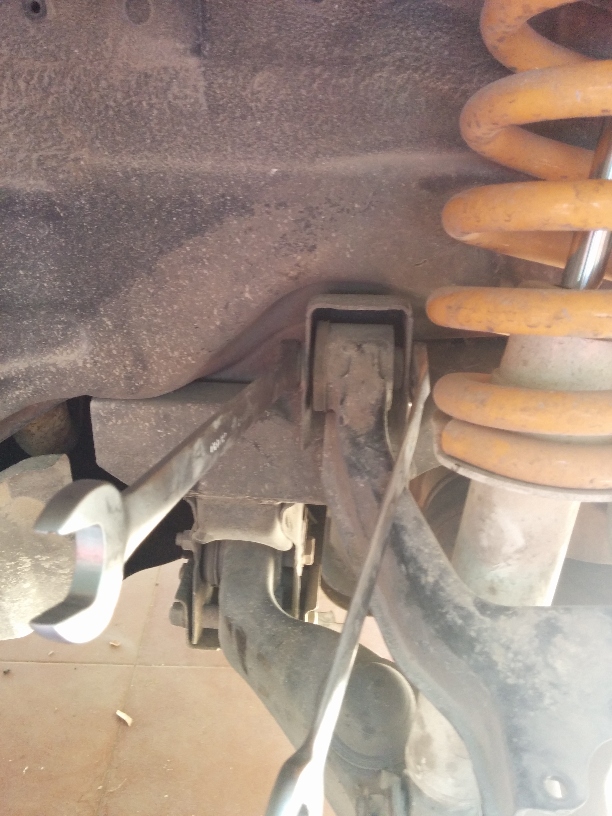
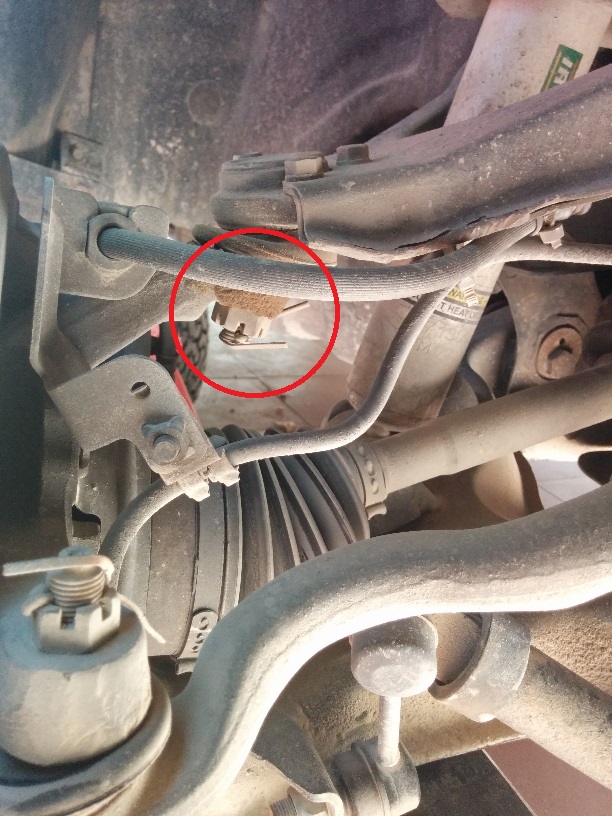
8. There should be 2x 12mm bolts on the inner side of the control arm that hold the ABS cable in place (and maybe the brake hose), remove the bolts.
9. Remove the control arm:
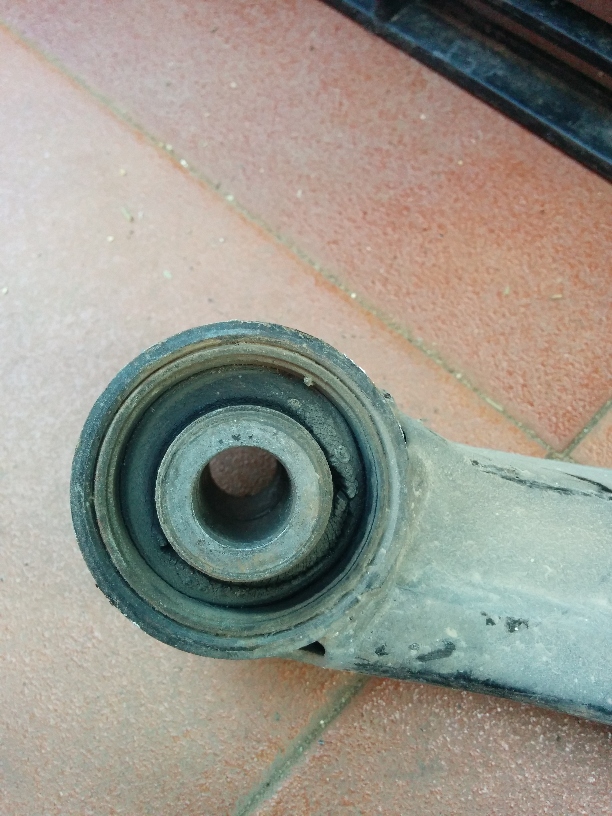
Here is how it looked on mine, notice the space between the inner sleeve to the rubber…
10. Now, the hardest part… removing the old bushings. Mitsubishi used bushings with lips on the outer side, so they can not be pressed out, you have to cut the old bushing and then use a hammer to push it out.
I did that as follows:
- Use hydraulic press to push the inner sleeve out of the bushing
- Use the grindstone spindle to remove the rubber till you’ll see the metal – only in one “row” no need to remove all of the rubber, only 1cm or so, through all of its width.
- Grind the metal of the bushing – be careful not to grind the control arm metal.
- Use a flat screw driver and a hammer – put and the screwdriver in the crack between the bushing and the control arm and hit it with the hammer till the bushing will collapse, bent and break inside.
- Use the hammer to push it outside.
11. Install the new bushings in place – use the hydraulic press to press the new bushings in place.
12. Install the control arm in place. Tip: I found that it is much easier to install it to the frame, then, insert the ball joint to the wheel hub and only then screw the ball joint to the control arm (the 3 bolts)
install the wheel, DO NOT tighten the control arm to the frame yet.
13. Carefully remove the jack stand, and lower the car. tight the wheel nuts. Tighten the control arm to the frame (the 22mm bolts) when the car is on the ground. The recommended torque is 147NM (+-10).
Related Posts


About The Author
saar
My name is Saar. I own a Pajero NM after more than 10 years with a Jeep Cherokee. I would like to document every possible information regarding the Pajero here on our site. Please feel free to contact me to add your stuff here.
For point number 5 – not to get the ball joint flying, keep the castle nut on the ball stud (untie the nut so that the outer edge of the nut and the end of the ball stud are on the same level), and then use the ball joint remover. Done several of these this way – a loud releasing knock, but nothing flies. Another recommendation is to first remove the nut completely to clear the threads, and then put it back on. The reason is that the ball joint may be fairly loose and if undoing the nut requires a little larger torque, the ball joint itself could rotate with the nut and would require some means of holding it.
Thank you,
Saar
Be gentle when tightening the 12mm bolts securing the ball joint to the arm, they’re easy to break.